sdvx controller
sound voltex is a popular japanese arcade rhythm game with a small yet strong community of active players. this controller allows similar games to be played at the comfort of your own gaming setup.
-
the sdvx controller measures about 450 x 290 x 80 mm. as real arcade buttons were used, 80mm was necessary to fit the entire switch mechanism. the housing is made completely of clear laser-cut 4.5mm acrylic, held together with wood cubes found in my junk drawer.
-
a laser-cut acrylic exterior housing is able to completely display each component in its entirety, including the spaghetti-like messy wiring. 7 arcade buttons and 2 digital rotary encoders are used to control the arduino leonardo, which is seen as a regular HID-compliant device by the host computer. a panel-mount USB-B extension was used to move the USB port to the exterior.
each panel is screwed into a wood cube in each corner, holding everything together.
-
sound voltex was one of my favorite games to play at the arcade round1. i was tired of spending money to play just 3 songs, so i wanted to see if it’d be possible to create my own controller using the same buttons and encoders. needless to say, this controller was used a lot less than the arcade machines, but it was still a surprise first feeling how precise and new the buttons and knobs felt when i first played it.
-
i opted with a clear acrylic housing as it was the cheapest option. 3D printing was out of the question as i wanted the controller to house the same size buttons and button spacing as the official arcade machine, and 3D printing would prove to be too costly and lacking the strength to endure so many heavy button presses. acrylic also would let the LEDs inside the arcade buttons shine and light the entire surface the controller is placed on.
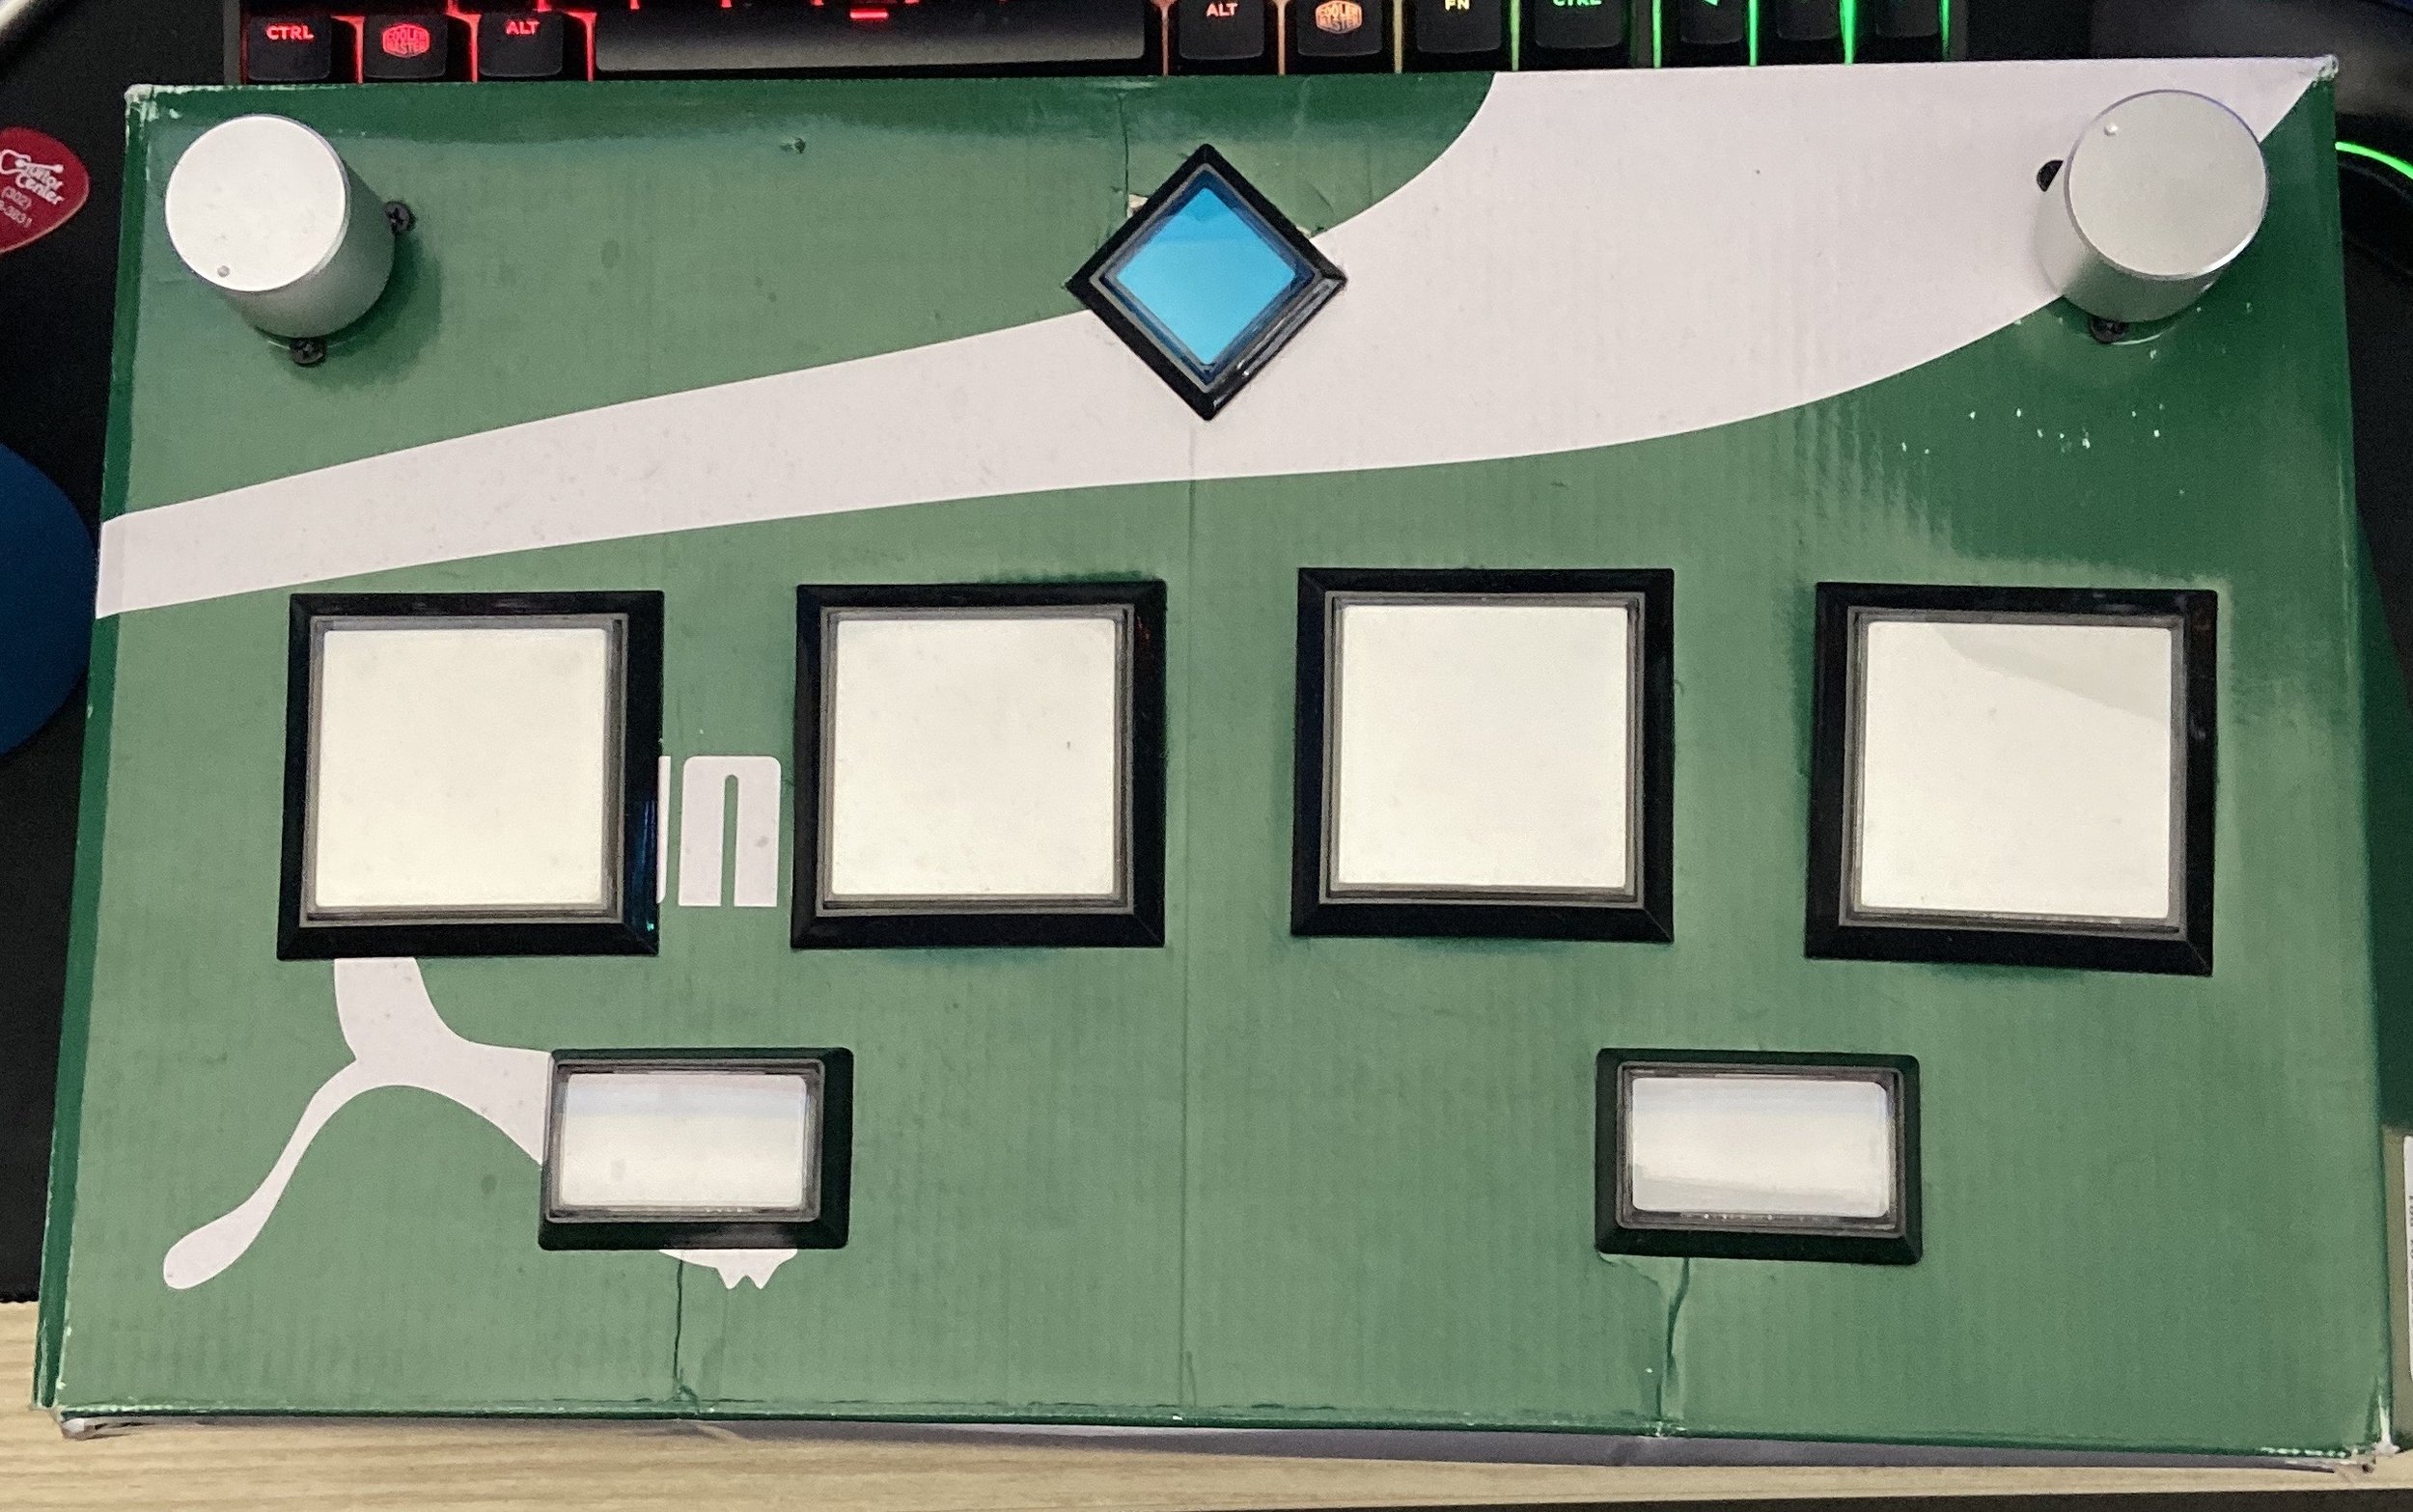
the first prototype was made inside of a shoebox, before i ordered the laser cut acrylic housing. as a proof of concept, it really helped me visualize the internal wiring, and gave me something to play with, before the acrylic was delivered.
the most challenging part of the project had to have been when i had to learn the ins-and-outs of how digital rotary encoders worked. i’ve only ever worked with potentiometers in extremely simple circuits, so this was a huge leap. this made programming the arduino quite a bit more challenging than expected.

